The Static Site Guide • Chapter 7
Extending Your Hugo Website
We’ve created a Hugo website with a theme, blog posts, and a customized footer. It’s good for what it is, but real-world websites need—in a word—more! You don’t have to take my word for it, though. As you continue adding content to your website, you’ll naturally discover that you need better ways to organize and display that content.
In this chapter, you’ll learn how to organize content using tags, implement pagination for blog posts, and create reusable shortcodes for common elements. You’ll also build custom navigation menus and create template partials that make your website easier to maintain.
These features will transform your vanilla Hugo website into a professional, well-organized site that’s easy to navigate and maintain. Let’s get started.
Tagging Content
Tags are one of the most effective ways to organize content on your website. They help you group content by topic and allow visitors to easily find related posts. Hugo has built-in support for tags, making them simple to implement.
Adding Tags to Blog Posts
Let’s start by adding tags to the blog posts we created in Chapter 6. Tags are added to the front matter of your Markdown files. Open my-first-post.md and add some tags:
+++
title = "My First Post"
date = "2025-07-03T16:38:40-07:00"
author = "Me"
tags = ["hugo", "getting-started", "blogging"]
draft = false
+++
Now let’s add tags to the other blog post. Open my-newest-post.md and add different tags:
+++
title = "My Newest Post"
date = "2025-07-03T19:43:47-07:00"
author = "Me"
cover = "img/old-town.jpg"
tags = ["hugo", "customization", "themes"]
draft = false
+++
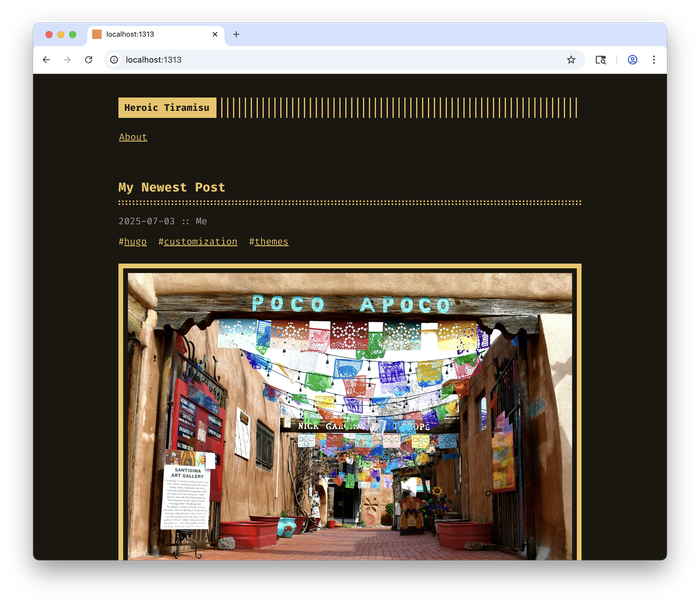
Save both files and start the Hugo server with hugo serve. You should now see tags displayed on your blog posts, as shown below.
Inspecting Tag Index Pages
Hugo automatically creates individual index pages for each tag. You can visit these pages by going to (for example) /tags/hugo/ or /tags/getting-started/ in your browser, as shown below.
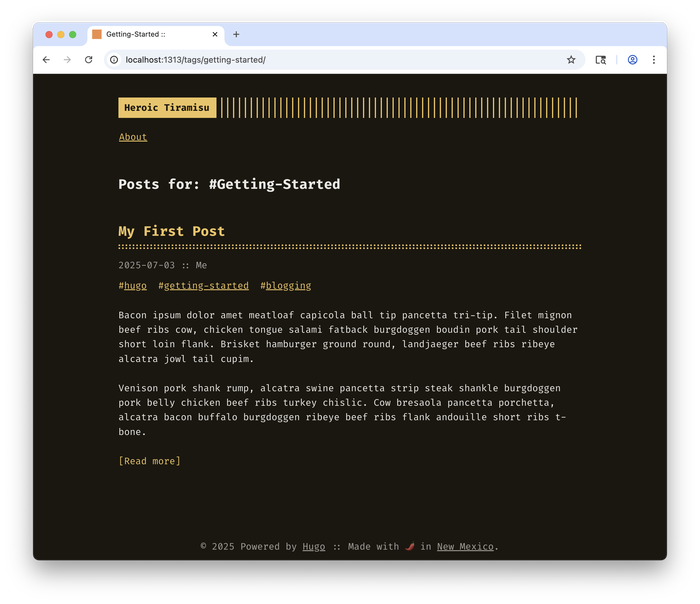
These pages list all the posts that use a particular tag. The Terminal theme includes basic tag page templates, but you can customize these if needed. For now, just know that the default behavior works for organizing your content.
Linking to the Tags List Page
Hugo also creates a page that shows all tags as well as the number of pages associated with each tag at /tags/. We can add this page to our navigation menu. Open your hugo.toml file and add the tags page to the menu section:
[languages.en.params.menu]
  [[languages.en.menu.main]]
    identifier = "about"
    name = "About"
    url = "/about"
  [[languages.en.menu.main]]
    identifier = "tags"
    name = "Tags"
    url = "/tags"
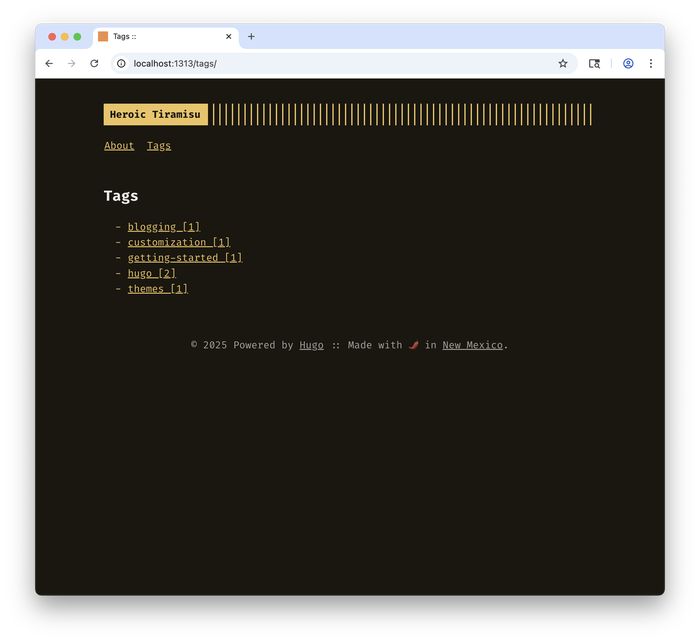
Save the file and refresh your browser. You should now see a Tags link in your navigation menu, as shown below.
Implementing Pagination
As you add more blog posts to your website, your homepage could become seriously cluttered with content. Nobody is going to want to scroll through dozens of your posts to find something interesting. Pagination solves this by breaking your post list into multiple pages, making your website easier to navigate.
Configuring Pagination
Hugo’s pagination is configured in your hugo.toml file. You already set this up earlier, but let’s review the setting:
pagination.pagerSize = 5
This tells Hugo to display five posts per page. You can of course change this number to adjust the number of posts per page. For a blog with long posts, you might want fewer posts per page. For a blog with short posts, you might want more.
Testing Pagination
To see pagination in action, you’ll need more than five blog posts. Let’s create a few more posts quickly using Hugo’s archetype feature. In your terminal, run these commands:
hugo new posts/learning-hugo.md
hugo new posts/static-sites-rock.md
hugo new posts/my-web-journey.md
hugo new posts/new-digs.md
Open each file and add some basic content and tags:
For learning-hugo.md:
+++
title = "Learning Hugo"
date = "2025-07-04T10:00:00-07:00"
author = "Me"
tags = ["hugo", "learning", "web-development"]
draft = false
+++

My journey learning Hugo has been exciting. Here's what I've discovered so far...
For static-sites-rock.md:
+++
title = "Static Sites Rock"
date = "2025-07-04T11:00:00-07:00"
author = "Me"
tags = ["static-sites", "performance", "web-development"]
draft = false
+++

Static sites offer amazing performance and security benefits...
For my-web-journey.md:
+++
title = "My Web Journey"
date = "2025-07-04T12:00:00-07:00"
author = "Me"
tags = ["personal", "web-development", "journey"]
draft = false
+++

Looking back on how I got started with web development...
For new-digs.md:
+++
title = "New Digs"
date = "2025-07-04T12:00:00-07:00"
author = "Me"
tags = ["personal", "web-development", "journey"]
draft = false
+++

My web presence just got a serious upgrade with Hugo...
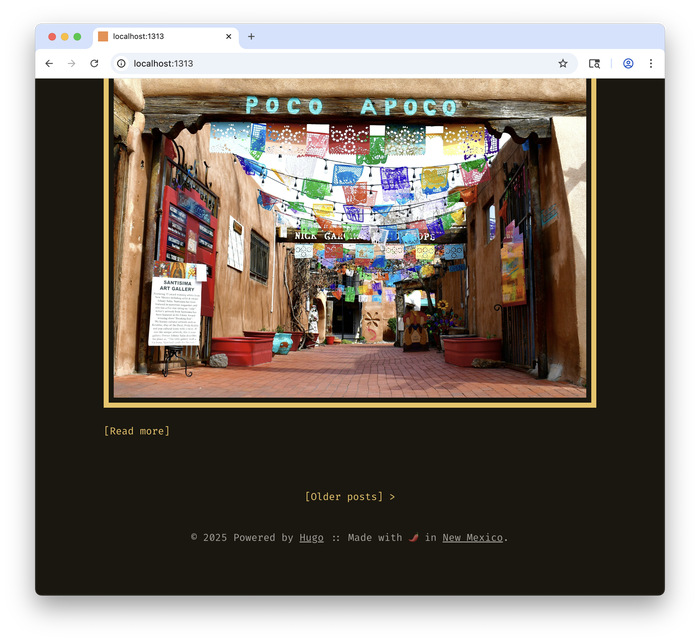
Save all the files and refresh the web page in your browser. You should now see pagination links at the bottom of your homepage, as shown below.
Using Shortcodes
Shortcodes are one of Hugo’s best features. These reusable snippets of content and code can be inserted into your Markdown files. They’re perfect for elements you use repeatedly, like tips or embedded content.
Creating an Aside Shortcode
Let’s create a shortcode for displaying tips, similar to the aside boxes used in this book. Create a new directory named shortcodes in the heroic-tiramisu/layouts/ directory, then create a file called tip.html inside the new directory:
<div class="tip-box" style="color: #000; background-color: #e8f5e8; border-left: 4px solid #4caf50; padding: 1rem; margin: 1rem 0; border-radius: 4px;">
    <strong>💡 Tip:</strong> {{ .Inner }}
</div>
Now you can use this shortcode in any of your blog posts. Open one of your blog posts and add this shortcode:
{{< tip >}}
Always carry extra water when walking around Albuquerque!
{{< /tip >}}
When you refresh the web page in your browser, you’ll see the shortcode content, as shown below.
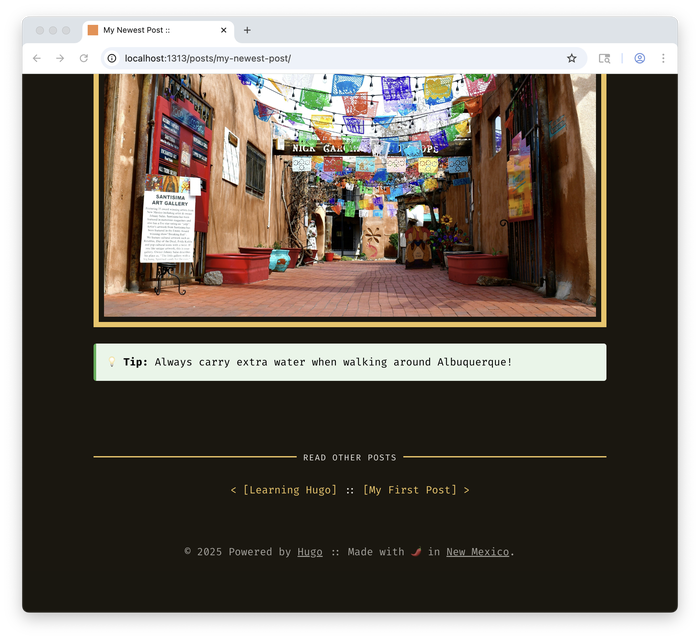
Here’s how it works. When Hugo builds the website, it takes the content between the tip tags, inserts it where the {{ .Inner }} tag is located in the shortcode file, and replaces the tip tags with the combined HTML.
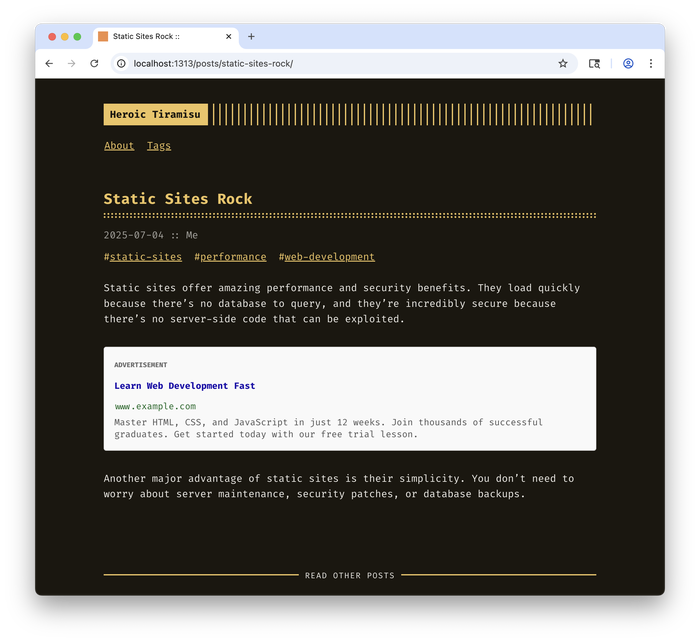
Creating a Text Ad Shortcode
Let’s create another shortcode for a simple text advertisement that you could insert into blog posts. These are common on websites with long blog posts, especially when they naturally fit with the content. Create a new file called text-ad.html inside the heroic-tiramisu/layouts/shortcodes/ directory:
<div class="text-ad" style="border: 1px solid #ddd; background-color: #f9f9f9; padding: 1rem; margin: 2rem 0; border-radius: 4px; font-size: 0.9em;">
    <div style="color: #666; font-size: 0.75em; text-transform: uppercase; margin-bottom: 0.5rem; font-weight: bold;">Advertisement</div>
    <div style="margin-bottom: 0.5rem;">
        <strong style="color: #1a0dab;">Learn Web Development Fast</strong>
    </div>
    <div style="color: #006621; margin-bottom: 0.25rem;">www.example.com</div>
    <div style="color: #545454; line-height: 1.3;">
        Master HTML, CSS, and JavaScript in just 12 weeks. Join thousands of successful graduates. Get started today with our free trial lesson.
    </div>
</div>
Now you can use this shortcode in any of your blog posts. For example, you might insert it in the middle of a longer blog post to break up the content:
+++
title = "Static Sites Rock"
date = "2025-07-04T11:00:00-07:00"
author = "Me"
tags = ["static-sites", "performance", "web-development"]
draft = false
+++

Static sites offer amazing performance and security benefits. They load quickly because there's no database to query, and they're incredibly secure because there's no server-side code that can be exploited.

{{< text-ad >}}

Another major advantage of static sites is their simplicity. You don't need to worry about server maintenance, security patches, or database backups.
When you refresh the web page in your browser, you’ll see the ad in your blog post, as shown below.
Reusing Shortcodes
The beauty of shortcodes is that you can reuse them anywhere. You could add the tip box to multiple blog posts, or the text ad to monetize your content. If you ever want to change the design or text, you only need to update the shortcode file once, and it will automatically be updated everywhere it’s used.
You can create shortcodes for any reusable content: author bios, social media links, or product recommendations. Once you start thinking in terms of reusable components, you’ll find lots of opportunities to use shortcodes.
Using Partials
Partials are reusable template components that can help you avoid duplicating content and code. They’re like shortcodes, only specially designed for use with template files (not Markdown files). They’re perfect for elements you want to include on every page of your website, like newsletter sign-ups and call-to-action boxes.
You’ve already worked with partials without realizing it! When we edited the footer in Chapter 6, we were editing a partial. The Terminal theme uses partials extensively to organize its code.
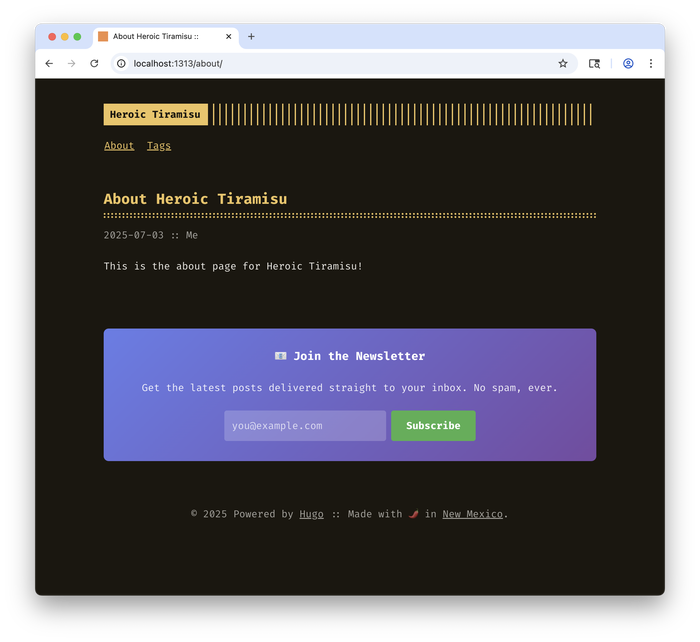
Creating a Newsletter Sign-Up Partial
Let’s create a newsletter sign-up box that uses Netlify’s built-in form feature, which we first explored in Chapter 3. Create a new directory named partials in the heroic-tiramisu/layouts/ directory, then create a new file called newsletter-signup.html inside the new directory:
<div class="newsletter-signup" style="background: linear-gradient(135deg, #667eea 0%, #764ba2 100%); color: white; padding: 2rem; margin: 2rem 0; border-radius: 8px; text-align: center;">
    <h3 style="margin-top: 0; color: white;">📧 Join the Newsletter</h3>
    <p style="margin-bottom: 1.5rem; opacity: 0.9;">Get the latest posts delivered straight to your inbox. No spam, ever.</p>

    <form name="newsletter" method="POST" data-netlify="true" style="max-width: 400px; margin: 0 auto;">
        <input type="hidden" name="form-name" value="newsletter" />
        <div style="display: flex; gap: 0.5rem; flex-wrap: wrap;">
            <input
                type="email"
                name="email"
                placeholder="you@example.com"
                required
                style="flex: 1; min-width: 200px; padding: 0.75rem; border: none; border-radius: 4px; font-size: 1rem; background-color: rgba(255,255,255,0.2); color: white;"
            />
            <button
                type="submit"
                style="padding: 0.75rem 1.5rem; background-color: #4CAF50; color: white; border: none; border-radius: 4px; font-size: 1rem; cursor: pointer; font-weight: bold;"
            >
                Subscribe
            </button>
        </div>
    </form>
</div>

<style>
.newsletter-signup input::placeholder {
    color: rgba(255, 255, 255, 0.7);
}
</style>
The form in our partial uses Netlify’s built-in form handling. As you might recall from when we created a form earlier, when someone submits their email address, Netlify will automatically capture it and send you a notification. You can view form submissions in the Forms section of the Netlify dashboard.
Embedding the Partial
Now you can use the partial in your template. Open a template file and add this line where you want the newsletter sign-up to appear:
{{ partial "newsletter-signup.html" . }}
For example, to make the newsletter sign-up box appear on every page, I added the partial to heroic-tiramisu/themes/terminal/layouts/_default/baseof.html
<!DOCTYPE html>
<html lang="{{ $.Site.Language }}">
<head>
  {{ block "title" . }}
    <title>{{ if .IsHome }}{{ $.Site.Title }}{{ else }}{{ .Title }} :: {{ $.Site.Title }}{{ end }}</title>
  {{ end }}
  {{ partial "head.html" . }}
</head>
<body>
{{ $container := cond ($.Site.Params.FullWidthTheme | default false) "container full" (cond ($.Site.Params.CenterTheme | default false) "container center" "container") }}

<div class="{{- $container -}}{{- cond ($.Site.Params.oneHeadingSize | default false) " headings--one-size" "" }}">

  {{ partial "header.html" . }}

  <div class="content">
    {{ block "main" . }}
    {{ end }}

    {{ partial "newsletter-signup.html" . }}
  </div>

  {{ block "footer" . }}
    {{ partial "footer.html" . }}
  {{ end }}
</div>

</body>
</html>
When you refresh the website in your browser, you’ll see the newsletter sign-up box embedded at the bottom of the page, as shown below.
Building Custom Navigation
As your website grows, you’ll want more control over your navigation menu. Let’s expand beyond the simple About and Tags links we’ve created.
Adding Multiple Menu Items
Let’s add more pages to our navigation. First, we’ll create a few more pages. Start by creating projects.md in the heroic-tiramisu/content/ directory:
+++
title = "Projects"
date = "2025-07-04"
author = "Me"
+++

Here are some of the projects I've been working on.
Next, create contact.md in the heroic-tiramisu/content/ directory:
+++
title = "Contact"
date = "2025-07-04"
author = "Me"
+++

Get in touch with me at me@example.com or find me on social media.
Now update your hugo.toml file to include the new pages:
[languages.en.params.menu]
  [[languages.en.menu.main]]
    identifier = "about"
    name = "About"
    url = "/about"
  [[languages.en.menu.main]]
    identifier = "projects"
    name = "Projects"
    url = "/projects"
  [[languages.en.menu.main]]
    identifier = "tags"
    name = "Tags"
    url = "/tags"
  [[languages.en.menu.main]]
    identifier = "contact"
    name = "Contact"
    url = "/contact"
Adding External Links
You can also add external links to your menu. For example, if you have a GitHub profile, you can add a link to it:
  [[languages.en.menu.main]]
    identifier = "github"
    name = "GitHub"
    url = "https://github.com/yourusername"
Controlling Menu Order
You can control the order of menu items by adding a weight parameter. Lower numbers appear first:
  [[languages.en.menu.main]]
    identifier = "about"
    name = "About"
    url = "/about"
    weight = 1
  [[languages.en.menu.main]]
    identifier = "projects"
    name = "Projects"
    url = "/projects"
    weight = 2
  [[languages.en.menu.main]]
    identifier = "tags"
    name = "Tags"
    url = "/tags"
    weight = 3
  [[languages.en.menu.main]]
    identifier = "contact"
    name = "Contact"
    url = "/contact"
    weight = 4
Building and Deploying
When you’re satisfied with your changes, build your website and deploy it. To do that, stop the Hugo server, run hugo to build your site, and then upload the public folder to Netlify. Refer back to Chapter 6 if you need detailed instructions. Your enhanced Hugo website is now ready for the world to see!
Next Steps
You’ve learned how to organize and customize a Hugo website. These techniques will serve you well as your website grows. The features you’ve implemented—tags, pagination, shortcodes, partials, and navigation—form the foundation of professional Hugo development.
We’re going to move on to other topics starting in the next chapter, but there’s a heck of a lot more you can do with Hugo. Honestly, we’ve barely scratched the surface! If you’d like to keep learning about Hugo, I encourage you to read through the Hugo documentation.